Why Is Your AC Not Blowing Cold Air? (7 Common Causes & Fixes) – 2025 Guide
There’s nothing quite like the relief of stepping into a cool, air-conditioned home on a sweltering summer day. But what happens when that expected blast of cold air turns lukewarm, or worse, feels no different than the air outside? An AC system failing to cool is more than just an inconvenience; it can quickly lead to uncomfortable living conditions and signal underlying problems that need immediate attention.
Many homeowners understandably feel a twinge of panic when their AC underperforms, envisioning costly repairs. While some issues do require professional expertise, a surprising number of common culprits can be diagnosed and even fixed with a little basic troubleshooting. Knowing what to look for can save you time, discomfort, and potentially money.
This comprehensive 2025 guide explores the most frequent reasons your air conditioner might not be blowing cold air. We’ll delve into everything from simple maintenance oversights to more complex mechanical failures, explaining the cause, the symptoms, potential DIY fixes, and—crucially—when it’s time to put down the tools and call a qualified HVAC technician.
A Quick Refresher: How Your AC Cools
Before troubleshooting, it helps to understand the basic principles of how your air conditioner works. Most central AC systems operate on a split system principle (an indoor unit and an outdoor unit) using a refrigeration cycle
- Indoor Unit (Evaporator Coil & Air Handler): Warm indoor air is pulled by a fan (part of the air handler or furnace) through a filter and across the evaporator coil. Inside this coil, a cold chemical blend called refrigerant absorbs heat from the air. This process cools the air and also removes humidity (which condenses as water). The now-cool air is blown back into your home through ducts.
- Refrigerant Lines: The refrigerant, having absorbed heat and turned into a low-pressure gas, travels through copper lines to the outdoor unit.
- Outdoor Unit (Compressor & Condenser Coil): The compressor (the “heart” of the system) pressurizes the refrigerant gas, significantly increasing its temperature. This hot, high-pressure gas then flows through the condenser coil. A large fan blows outdoor air across these coils, allowing the heat absorbed from your home to dissipate into the outside air. As it cools, the refrigerant condenses back into a high-pressure liquid.
- Expansion Valve: The high-pressure liquid refrigerant travels back towards the indoor unit, passing through an expansion valve that rapidly lowers its pressure and temperature, turning it into the very cold, low-pressure mixture that flows back into the evaporator coil to start the cycle again.
Any interruption or inefficiency in this cycle – whether due to blocked airflow, incorrect refrigerant levels, electrical issues, or component failure – can result in your AC not blowing cold air.
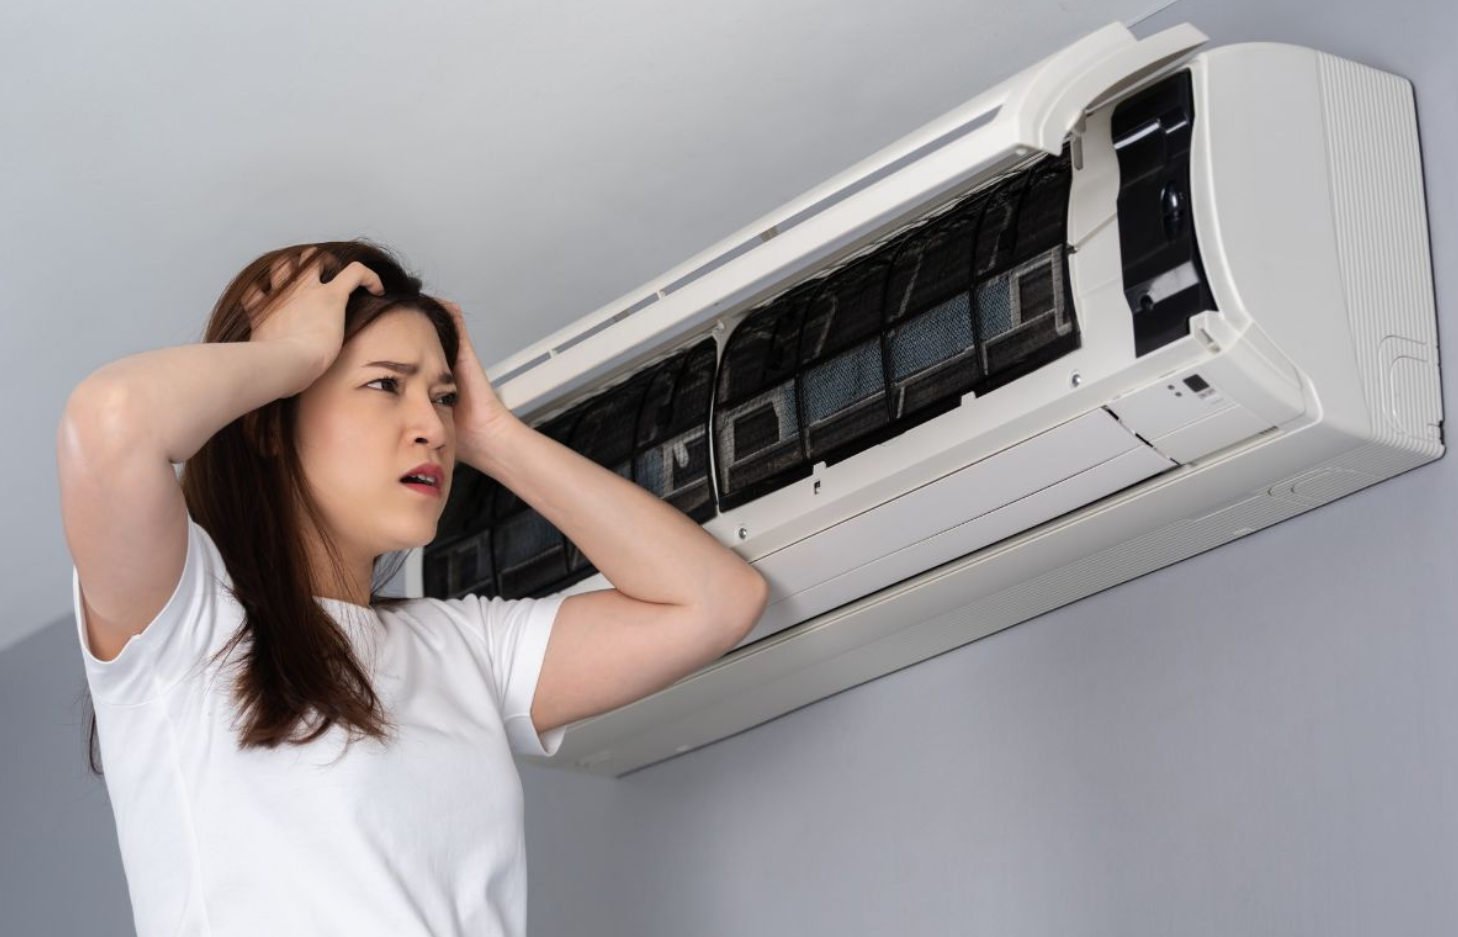
1. Blocked Airflow: The Most Common Culprit
Proper airflow is absolutely essential for your AC to cool effectively. Air needs to move freely through the filter, over the indoor evaporator coil, out through your vents, and the outdoor unit needs to expel heat efficiently. Restrictions anywhere along this path will hinder the cooling process.
Is it a Dirty Filter?
This is, without a doubt, the number one reason for an AC system to underperform or stop cooling. It’s also the easiest and cheapest problem to fix.
- How it Causes Problems: The air filter’s job is to trap dust, pollen, pet dander, and other airborne particles before they reach sensitive AC components. Over time, this trapped debris builds up, creating a thick mat that severely restricts the amount of air that can pass through.
- The Consequences:
- Reduced Cooling: Less warm air flows over the evaporator coil, meaning less heat is absorbed, and the air blown back into your home isn’t as cold.
- Frozen Evaporator Coil: This is a major consequence. When airflow is too low, the refrigerant in the evaporator coil gets excessively cold because there isn’t enough warm air passing over it to facilitate heat exchange. Moisture in the air freezes onto the super-cold coils, creating a layer of ice. This ice acts as an insulator, further blocking airflow and drastically reducing cooling capacity. You might even see ice on the refrigerant lines. Ironically, an iced-over coil prevents cooling.
- Increased Strain & Energy Use: The system’s fan motor has to work much harder to pull air through the clogged filter, leading to higher electricity bills and potential motor burnout.
- Poor Air Quality: A filter overloaded with contaminants can no longer effectively clean the air and may even contribute to circulating dust and allergens.
- How to Check:
- Locate your filter. It’s usually in the return air duct (the large grille where air is sucked into the system) or in a slot within the air handler/furnace unit itself.
- Slide the filter out.
- Hold it up to a light source. If you can’t easily see light through it, or if it’s visibly caked with dust and grime, it’s dirty.
- How Often to Change/Clean: This varies:
- Basic Fiberglass Filters (1-inch): Change monthly.
- Pleated Filters (1-inch): Change every 1-3 months. Check monthly.
- Thicker Pleated Filters (4-6 inches): Change every 6-12 months. Check every few months.
- Washable/Electrostatic Filters: Clean according to manufacturer instructions (usually monthly or quarterly). Ensure they are completely dry before reinstalling.
- Household Factors: Change more frequently if you have pets, smokers, allergies, live in a dusty area, or run your system often.
- The Fix (Simple DIY):
- Turn off your AC system at the thermostat.
- Locate and remove the old filter. Note the size printed on the filter’s frame (e.g., 16x25x1).
- Purchase a replacement filter of the exact same size. Pay attention to the airflow direction arrow printed on the new filter.
- Slide the new filter into the slot, ensuring the arrow points in the direction of airflow (usually towards the air handler/furnace).
- Turn your AC system back on.
Changing your air filter regularly is the single most important piece of AC maintenance you can perform. If a dirty filter was the issue, you should notice improved cooling fairly quickly, although a frozen coil may need time to thaw (turn the system OFF but leave the fan ON to speed this up).
Other Airflow Blockages
While the filter is the prime suspect, other blockages can occur:
- Blocked Vents and Registers: Are furniture, rugs, curtains, or other items blocking the supply vents (where cold air blows out) or the return vents (where air is sucked in)? Air needs to circulate freely throughout the room.
- The Fix: Walk around your house and ensure all vents are clear and unobstructed. Adjust furniture as needed.
- Dirty Evaporator Coil: If dust bypasses a poorly fitted or damaged filter, or if maintenance has been neglected for years, the indoor evaporator coil itself can become coated in dirt and grime. This acts like insulation, preventing the coil from effectively absorbing heat from the air.
- Signs: Reduced cooling, potential freezing (even with a clean filter), musty odors.
- The Fix: Cleaning the evaporator coil is delicate work, often requiring partial disassembly of the air handler and specialized cleaning solutions. While minor surface dust might be gently vacuumed, a deep clean is best left to an HVAC professional to avoid damaging the fragile coil fins or electrical components.
- Dirty/Blocked Condenser Coil (Outdoor Unit): The outdoor unit’s job is to release the heat absorbed from your home. The condenser coils wrap around the unit, and the fan pulls air through them. If these coils are covered in dirt, grass clippings, leaves, cottonwood seeds, or other debris, the unit cannot efficiently dissipate heat.
- Signs: Reduced cooling efficiency (AC runs longer to cool), unit may overheat and shut down, higher energy bills.
- The Fix (Potential DIY with Caution):
- Turn off power to the outdoor unit! Find the electrical disconnect box near the unit (usually a metal box on the wall) and turn off the switch or pull out the disconnect block. Also, turn off the corresponding breaker in your main electrical panel. Safety first!
- Visually inspect the coils (the thin metal fins). Remove large debris like leaves or twigs by hand.
- Use a garden hose (gentle pressure only – never a pressure washer) to spray water from the inside out (if possible) or from the outside in. Rinse the dirt and debris downwards, away from the unit.
- Be careful not to bend the delicate aluminum fins. If some are bent, you can gently straighten them with a fin comb (available at hardware stores), but proceed cautiously.
- Allow the unit to dry, then restore power.
- If the coils are heavily impacted with grime or you’re uncomfortable, call an HVAC professional for a proper cleaning.
Ensuring clear airflow through filters, coils, and vents is fundamental to efficient cooling.
2. Refrigerant Issues: The Cooling Agent Problem
Refrigerant (often referred to by older brand names like Freon, although R-22 Freon is being phased out in favor of refrigerants like R-410A) is the lifeblood of your air conditioning system. It’s the substance that continuously cycles between liquid and gas, absorbing heat from inside your home and releasing it outside.
Your AC is designed as a sealed system. Unlike oil in a car, refrigerant should never be “used up” or “consumed.” If your system is low on refrigerant, it almost certainly means there is a leak somewhere in the lines, coils, or compressor.
Signs of a Freon Leak
Detecting a refrigerant leak often requires professional tools, but several symptoms strongly suggest low refrigerant levels:
- Warm or Lukewarm Air: This is the most obvious sign. The system lacks sufficient refrigerant to effectively absorb heat from the indoor air.
- Ice or Frost Buildup: Similar to a severely blocked filter, low refrigerant causes a pressure drop within the evaporator coil, making it extremely cold. Moisture freezes onto the coil or the copper refrigerant lines (especially the larger, insulated one, called the suction line) running to the outdoor unit.
- Hissing or Bubbling Sounds: A significant leak might produce audible hissing sounds near the indoor or outdoor unit, or bubbling noises from the refrigerant lines.
- Longer Cooling Cycles: The AC has to run much longer than usual to reach the desired temperature, or it may run continuously without ever satisfying the thermostat.
- Increased Electricity Bills: The system runs inefficiently and for extended periods, consuming more energy.
- Oily Residue: Refrigerant often circulates with lubricating oil. A leak may leave a noticeable greasy or oily patch on fittings, joints, or coils.
Why Leaks Occur
Refrigerant leaks can happen due to various reasons:
- Vibrations: Normal system operation causes vibrations that can slowly loosen fittings or create micro-cracks over many years.
- Corrosion: Formic acid (formicary corrosion) or simple rust can corrode the copper or aluminum tubing, especially at joints or bends, leading to pinhole leaks. This is more common in areas with high humidity or specific air pollutants.
- Physical Damage: Accidental punctures during installation, landscaping mishaps near the outdoor unit, or damage from objects hitting the coils.
- Wear and Tear: Seals and joints can degrade over time.
The Fix: Strictly a Professional Job
Dealing with refrigerant is not a DIY task for several critical reasons:
- Legality & Certification: Handling refrigerants requires EPA Section 608 certification due to their potential environmental impact (ozone depletion or global warming potential). It is illegal for uncertified individuals to buy, handle, or vent refrigerants.
- Safety Risks: Refrigerants are under pressure and can cause frostbite if they contact skin. Some are also flammable. Working with high-pressure systems requires specialized knowledge and safety precautions.
- Specialized Tools: Professionals use electronic leak detectors, UV dye kits, pressure gauges (manifold gauges), vacuum pumps, and refrigerant recovery machines – tools homeowners don’t possess.
- Environmental Concerns: Improper handling can release harmful chemicals into the atmosphere. Professionals are required to recover (capture) refrigerant before making repairs.
The Professional Process:
- Leak Detection: A technician will use specialized tools to pinpoint the exact location(s) of the leak(s). This can be time-consuming.
- Repair: The leaking component (e.g., a section of tubing, a valve, the coil itself) must be repaired (often by brazing) or replaced.
- Evacuation: The entire system is evacuated using a vacuum pump to remove air, moisture, and contaminants that entered during the leak/repair.
- Recharge: The system is recharged with the correct type and amount of refrigerant, measured precisely by weight according to the manufacturer’s specifications.
“Topping Off” is NOT a Solution: Simply adding more refrigerant without finding and fixing the leak is illegal, environmentally irresponsible, and only a temporary fix. The system will just leak again, wasting expensive refrigerant and potentially damaging the compressor due to incorrect operating pressures.
Cost Considerations: Refrigerant leak repair can be expensive, depending on the leak’s location and severity. The cost of the refrigerant itself is also a factor. R-22 (“Freon”), used in older systems (typically pre-2010), has been phased out due to environmental regulations and is now extremely expensive and difficult to obtain. If you have a major R-22 leak, it often makes more financial sense to replace the entire system with a newer one using R-410A or another modern refrigerant.
3. Thermostat Troubles: The Brain Isn’t Talking
Your thermostat is the command center of your HVAC system. It senses the room temperature, compares it to your desired setting, and tells the AC when to turn on and off. If the thermostat isn’t functioning correctly, it can prevent your AC from cooling even if the rest of the system is perfectly fine.
Is Your Thermostat Not Working?
Before assuming a major AC component failure, always troubleshoot the thermostat first. Many issues are simple fixes:
- Incorrect Settings (The Obvious Check):
- Is the thermostat set to COOL mode? Accidentally switching it to HEAT or OFF will prevent cooling.
- Is the temperature setting lower than the current room temperature? The AC won’t turn on if the set point is already satisfied or higher than the ambient temperature. Lower it by 5 degrees and see if the AC kicks on (allow a few minutes for potential delays).
- Is the fan setting on AUTO or ON?
- AUTO: The fan runs only when the AC is actively cooling. This is the normal, energy-efficient setting.
- ON: The fan runs continuously, even when the AC isn’t cooling. If set to ON, you’ll feel air blowing from the vents constantly, but it will only be cold during cooling cycles. This can sometimes make the air feel warmer overall if the AC isn’t running enough. Switch it to AUTO for troubleshooting cooling issues.
- Dead Batteries: Many digital thermostats rely on batteries for power, especially if they aren’t “hardwired” with a C-wire. Low or dead batteries can cause the display to go blank, become erratic, or fail to signal the AC unit.
- The Fix: Open the thermostat cover (it usually snaps off or slides up) and replace the batteries (typically AA or AAA). Wait a few minutes after replacement for it to reset.
- Tripped Breaker or Power Issue: The thermostat itself, and the entire AC system, needs electrical power.
- The Fix: Check your home’s main electrical panel. Look for breakers labeled “AC,” “Air Handler,” “Furnace,” or “HVAC.” If a breaker is tripped (usually in the middle position or flipped to OFF), try resetting it by pushing it fully OFF and then back ON. If it trips again immediately, do not reset it again – call an electrician or HVAC pro, as this indicates a serious electrical fault.
- Location Issues: The thermostat reads the temperature of the air immediately surrounding it. If it’s poorly located, its readings will be inaccurate.
- Is it in direct sunlight? This will make it think the room is much warmer than it is, causing the AC to run excessively or erratically.
- Is it near a heat-producing appliance (lamp, TV, computer)? Same problem.
- Is it directly above or below an air supply vent? This can cause short-cycling.
- The Fix: While relocating a thermostat requires professional wiring work, you can address external factors like closing curtains to block sun or moving lamps away.
- Dirty Internals: Dust and grime can accumulate inside the thermostat housing over time, potentially interfering with mechanical contacts (in older models) or temperature sensors (in digital models).
- The Fix: Turn off the power to your HVAC system at the breaker. Carefully remove the thermostat cover. Use a soft brush or a can of compressed air (held upright) to gently clean away dust from the internal components. Avoid touching sensitive parts directly. Restore power.
- Calibration Issues: Sometimes, a thermostat’s temperature sensor can drift over time, causing it to read the room temperature inaccurately (e.g., reading 75°F when it’s actually 72°F). This can prevent it from calling for cooling when needed.
- The Fix: Check your thermostat’s manual. Some digital models allow for temperature offset calibration. If not, or if the inaccuracy is significant, replacement might be necessary. You can verify accuracy with a separate, reliable thermometer placed next to the thermostat (allow 15 minutes for stabilization).
- Faulty Wiring or Components: Connections behind the thermostat can become loose, or internal components like sensors or relays can fail.
- Signs: Display issues, erratic behavior, failure to activate the AC despite correct settings and power.
- The Fix: This requires diagnosis and repair by an HVAC professional or electrician. Do not attempt complex wiring adjustments yourself.
- Needs Replacement: Older mechanical thermostats (with mercury vials or bimetallic strips) are prone to failure and inaccuracy. Even older digital models can degrade.
- The Fix: Consider upgrading to a new programmable or smart thermostat. These offer better accuracy, energy savings through scheduling, and remote control features. Installation can sometimes be a DIY project if you’re comfortable with basic wiring (always turn off the power!), but professional installation ensures it’s done correctly.
Thermostat issues are common and often easily resolved, so always start your troubleshooting here.
4. Condensate Drain Problems: Water Woes
Part of the air conditioning process involves removing humidity from your indoor air. This moisture condenses on the cold evaporator coil and drips into a collection pan (the condensate pan) located beneath the coil in your indoor air handler unit. A drain line, typically a PVC pipe, carries this water away, usually to a floor drain, utility sink, or outside your home.
If this drain line becomes clogged, water backs up, leading to problems that can shut down your AC.
- How Clogs Happen: The cool, damp environment inside the air handler is a breeding ground for algae, mold, and slime. Dust and debris can also accumulate, forming blockages in the narrow drain line or trap.
- Consequences of a Clog:
- Water Backup: The drain pan fills with water.
- Overflow Switch Activation: Most modern systems have a safety float switch in the drain pan or along the drain line. If water levels rise too high, this switch triggers, shutting off the AC system to prevent water damage. This is a common reason for an AC that suddenly stops working entirely (not just stops cooling).
- Water Damage: If the safety switch fails or isn’t present, the pan can overflow, potentially causing significant water damage to ceilings, walls, floors, and the air handler itself.
- Musty Odors: Mold and algae growth can create unpleasant smells circulating through your vents.
- Signs of a Clog:
- AC system is not running at all or shuts off intermittently.
- Water pooling around the indoor air handler unit.
- Visible water in the emergency/secondary drain pan (if equipped).
- Alerts from a smart thermostat indicating a drain issue or system shutdown.
- Musty or moldy smells coming from the vents when the system runs.
- The Fix (Potential DIY):
- Turn off power to the AC system at the thermostat and breaker.
- Locate the drain line: Find the PVC pipe exiting your indoor unit. It often has a T-fitting with a cap near the unit for access.
- Check the pan: Inspect the primary drain pan (under the coil) and the secondary pan (if present, often under the whole unit) for standing water. Sop up any water.
- Attempt to Clear (Option A – Wet/Dry Vac): Remove the cap from the access T. Use a wet/dry vacuum cleaner to suction out the clog from the drain line opening. Create a seal around the hose and opening for better suction. Let it run for a few minutes.
- Attempt to Clear (Option B – Vinegar/Bleach): Slowly pour a solution of one part bleach to one part water (or undiluted white vinegar for a less harsh option) down the access T. Let it sit for 30 minutes to dissolve algae/slime, then flush with water. Use caution with bleach – avoid spills and ensure good ventilation.
- Check Outdoor Exit: Find where the drain line terminates outside. Ensure it isn’t blocked by dirt, grass, or debris.
- Restore Power: Turn the system back on and monitor if water begins draining properly (you might see it dripping outside).
- When to Call a Pro: If you can’t locate the drain, can’t clear the clog, suspect a leak in the pan or line itself, or if water damage has occurred, call an HVAC professional. They have specialized tools (like pressurized nitrogen or drain snakes) to clear stubborn clogs. Regular maintenance often includes preventative drain line cleaning.
5. Electrical Issues: Power & Control Faults
Modern AC systems contain numerous electrical components – motors, capacitors, contactors, control boards, and miles of wiring. A failure in any of these can prevent the system from starting, running correctly, or cooling effectively. Working with electrical components is dangerous and should generally be left to professionals.
- Tripped Circuit Breaker: As mentioned with thermostats, the indoor air handler and the outdoor condenser unit are usually on separate circuit breakers. A power surge, overloaded circuit, or a failing electrical component within the AC unit can cause a breaker to trip, cutting power.
- Check/Fix: Locate your main electrical panel. Find the breakers for your AC units. If one is tripped, reset it once. If it trips again immediately or shortly after the AC tries to start, leave it off and call an HVAC technician or electrician. A repeatedly tripping breaker signals a potentially dangerous electrical short or component failure.
- Faulty Capacitors: Capacitors are small, cylindrical components that store electrical energy and provide a boost to start the compressor and fan motors (start capacitor) or keep them running smoothly (run capacitor). They degrade over time and are a common point of failure, especially in extreme heat.
- Signs: Humming noise from the unit but the motor doesn’t start, motor starts slowly or struggles, outdoor fan spins slowly or not at all, compressor won’t turn on, AC blows warm air. Visually, a failed capacitor might bulge at the top or leak oily fluid.
- The Fix: Capacitors hold a powerful electrical charge even when the power is off, making replacement dangerous for DIYers. This requires diagnosis and replacement by a qualified HVAC professional.
- Faulty Contactor: The contactor is essentially a heavy-duty electrical switch located in the outdoor unit. It receives the low-voltage signal from the thermostat and closes, allowing high voltage to flow to the compressor and condenser fan motor.
- Signs: Outdoor unit won’t turn on at all (no sound) even though the indoor fan is running and the thermostat is calling for cool. Sometimes, ants or debris can get inside and prevent contact, or the contacts can become pitted/burnt out.
- The Fix: Diagnosis and replacement must be done by an HVAC professional due to the high voltages involved.
- Wiring Problems: Over time, wires can become frayed, corroded, loose at connections, or damaged by pests.
- Signs: Intermittent operation, breakers tripping, system not starting, burning smells.
- The Fix: Wiring issues pose a significant fire hazard and require immediate attention from a licensed electrician or HVAC technician.
6. Compressor Problems: The Heart of the System
The compressor, located inside the outdoor unit, is the most complex and expensive component of your AC system. It’s responsible for pressurizing the refrigerant, enabling the heat transfer process. Compressor failure is a major issue.
- Signs of Compressor Failure:
- Outdoor unit tries to start but immediately trips the circuit breaker.
- Loud, unusual noises from the outdoor unit (grinding, banging, clanking, severe rattling).
- AC blows warm or lukewarm air, and you can confirm the compressor itself isn’t running (you typically hear a distinct hum/vibration when it is).
- Reduced cooling performance coupled with high energy bills.
- Causes: Age, lack of maintenance, electrical problems (failed capacitors/contactors putting strain on it), refrigerant leaks (running with low/high refrigerant damages the compressor), blockages in the system.
- The Fix: Diagnosing and replacing a compressor is strictly a job for experienced HVAC professionals. It’s labor-intensive and costly. Often, if the compressor fails on an older system (10+ years), the cost of replacement (parts and labor) can approach 50% or more of the cost of a completely new outdoor unit or even a full system replacement. Your technician will help you weigh the options between repair and replacement based on the system’s age, condition, and warranty status.
7. Undersized or Aging System
Sometimes, the issue isn’t a specific broken part but the system’s overall capacity or condition.
- Undersized Unit: If the AC unit installed is too small for the square footage, insulation level, window exposure, and heat load of your home, it will struggle to keep up, especially during peak heat. It might run constantly but never reach the desired temperature, blowing air that feels cool-ish but not truly cold. This is an installation issue rather than a malfunction.
- The Fix: The only real solution is replacing the system with a properly sized unit, determined by a professional load calculation (Manual J).
- Aging System: Air conditioners typically last 12-15 years (sometimes longer with excellent maintenance, sometimes less in harsh climates). As components age, their efficiency naturally declines. An older unit might still function but simply lack the cooling power it once had, or become prone to more frequent breakdowns.
- The Fix: While repairs might keep it limping along, eventually replacement becomes the more cost-effective and reliable option, offering better efficiency (lower bills) and improved comfort.
When to Call a Pro
While some AC issues are easy DIY fixes, many require the expertise, tools, and safety precautions of a trained HVAC professional. Knowing when to stop troubleshooting and make the call is crucial.
Try These DIY Checks First:
- Check Thermostat: Settings correct? Batteries fresh? Set to COOL, AUTO fan, temp below room temp?
- Check Air Filter: Is it clean? Replace if dirty.
- Check Vents: Are all supply and return vents clear and open?
- Check Outdoor Unit: Coils reasonably clean? Fan spinning? No obvious obstructions? (Turn off power before cleaning).
- Check Breakers: Have any tripped? Reset once.
- Check Condensate Drain: Any visible water backup? Try basic clearing methods if comfortable.
Call an HVAC Professional Immediately If:
- You Suspect a Refrigerant Leak: Hissing sounds, visible frost/ice on lines or coils (after checking filter), oily residue.
- Breaker Trips Repeatedly: Indicates a serious electrical fault. Leave the breaker OFF.
- Loud or Unusual Noises: Grinding, squealing, banging, screeching from either indoor or outdoor unit.
- Warm Air Persists: After checking the filter, thermostat, and basic airflow, the air is still not cold.
- Ice Buildup: Significant ice on the evaporator coil or refrigerant lines persists even after changing the filter and allowing thaw time.
- System Short-Cycles: Turns on and off rapidly every few minutes.
- No Power / System Won’t Turn On: After checking breakers and thermostat batteries.
- Burning Smells: Indicates overheating electrical components – turn the system off immediately.
- Water Damage: Visible water damage around the indoor unit due to drain overflow or leaks.
- You Are Uncomfortable or Unsure: If you lack the knowledge, tools, or confidence to safely perform any check or maintenance, it’s always best to call a pro.
Why Call a Pro?
- Safety: Dealing with high voltages, pressurized refrigerants, and complex machinery carries risks.
- Specialized Tools: Technicians have diagnostic equipment (multimeters, gauge manifolds, leak detectors) you don’t.
- Expertise: They can quickly diagnose complex issues that aren’t obvious.
- Efficiency: They can perform repairs correctly and safely, restoring your cooling faster.
- Warranty: DIY repairs can void manufacturer warranties.
The Value of Maintenance: Many common AC problems can be prevented with regular professional maintenance (typically once or twice a year). A tune-up includes cleaning coils, checking refrigerant levels (and fixing minor leaks before they become major), inspecting electrical components, clearing drain lines, and ensuring optimal performance, which can prevent unexpected breakdowns during the hottest days.
Conclusion: Restoring Your Cool Comfort
An air conditioner blowing warm air is a frustrating experience, but often, the solution is simpler than you might fear. Start with the basics: check your thermostat settings and replace that dirty air filter. Ensure vents aren’t blocked and the outdoor unit can breathe. These simple steps resolve a significant number of cooling issues.
However, don’t hesitate to call a qualified HVAC professional if the problem persists or if you encounter signs of more complex issues like refrigerant leaks, electrical faults, or strange noises. Prioritizing safety and proper diagnosis is key. By understanding the common causes and knowing when to seek expert help, you can efficiently address the problem and restore cool, comfortable air to your home.